# SketchUp
## Supported SketchUp Versions
Cityweft is compatible with SketchUp 2019 and all later versions, including SketchUp 2020, 2021, 2022, 2023, 2024, 2025, and 2026. Both macOS and Windows are fully supported.
#### Supported Operating Systems
* **Windows**
* **macOS**
## Activating Plugin
A **valid Cityweft API key** is required to use the plugin.
API keys can be generated and managed from your **Cityweft API Dashboard**.
For detailed instructions on how to obtain and manage your API key, see the section:
{% content-ref url="getting-your-api-key" %}
[getting-your-api-key](https://cityweft.gitbook.io/docs/plugins/getting-your-api-key)
{% endcontent-ref %}
## **Getting Started**
Before getting started, ensure you have followed the instructions for both installation and API key access.
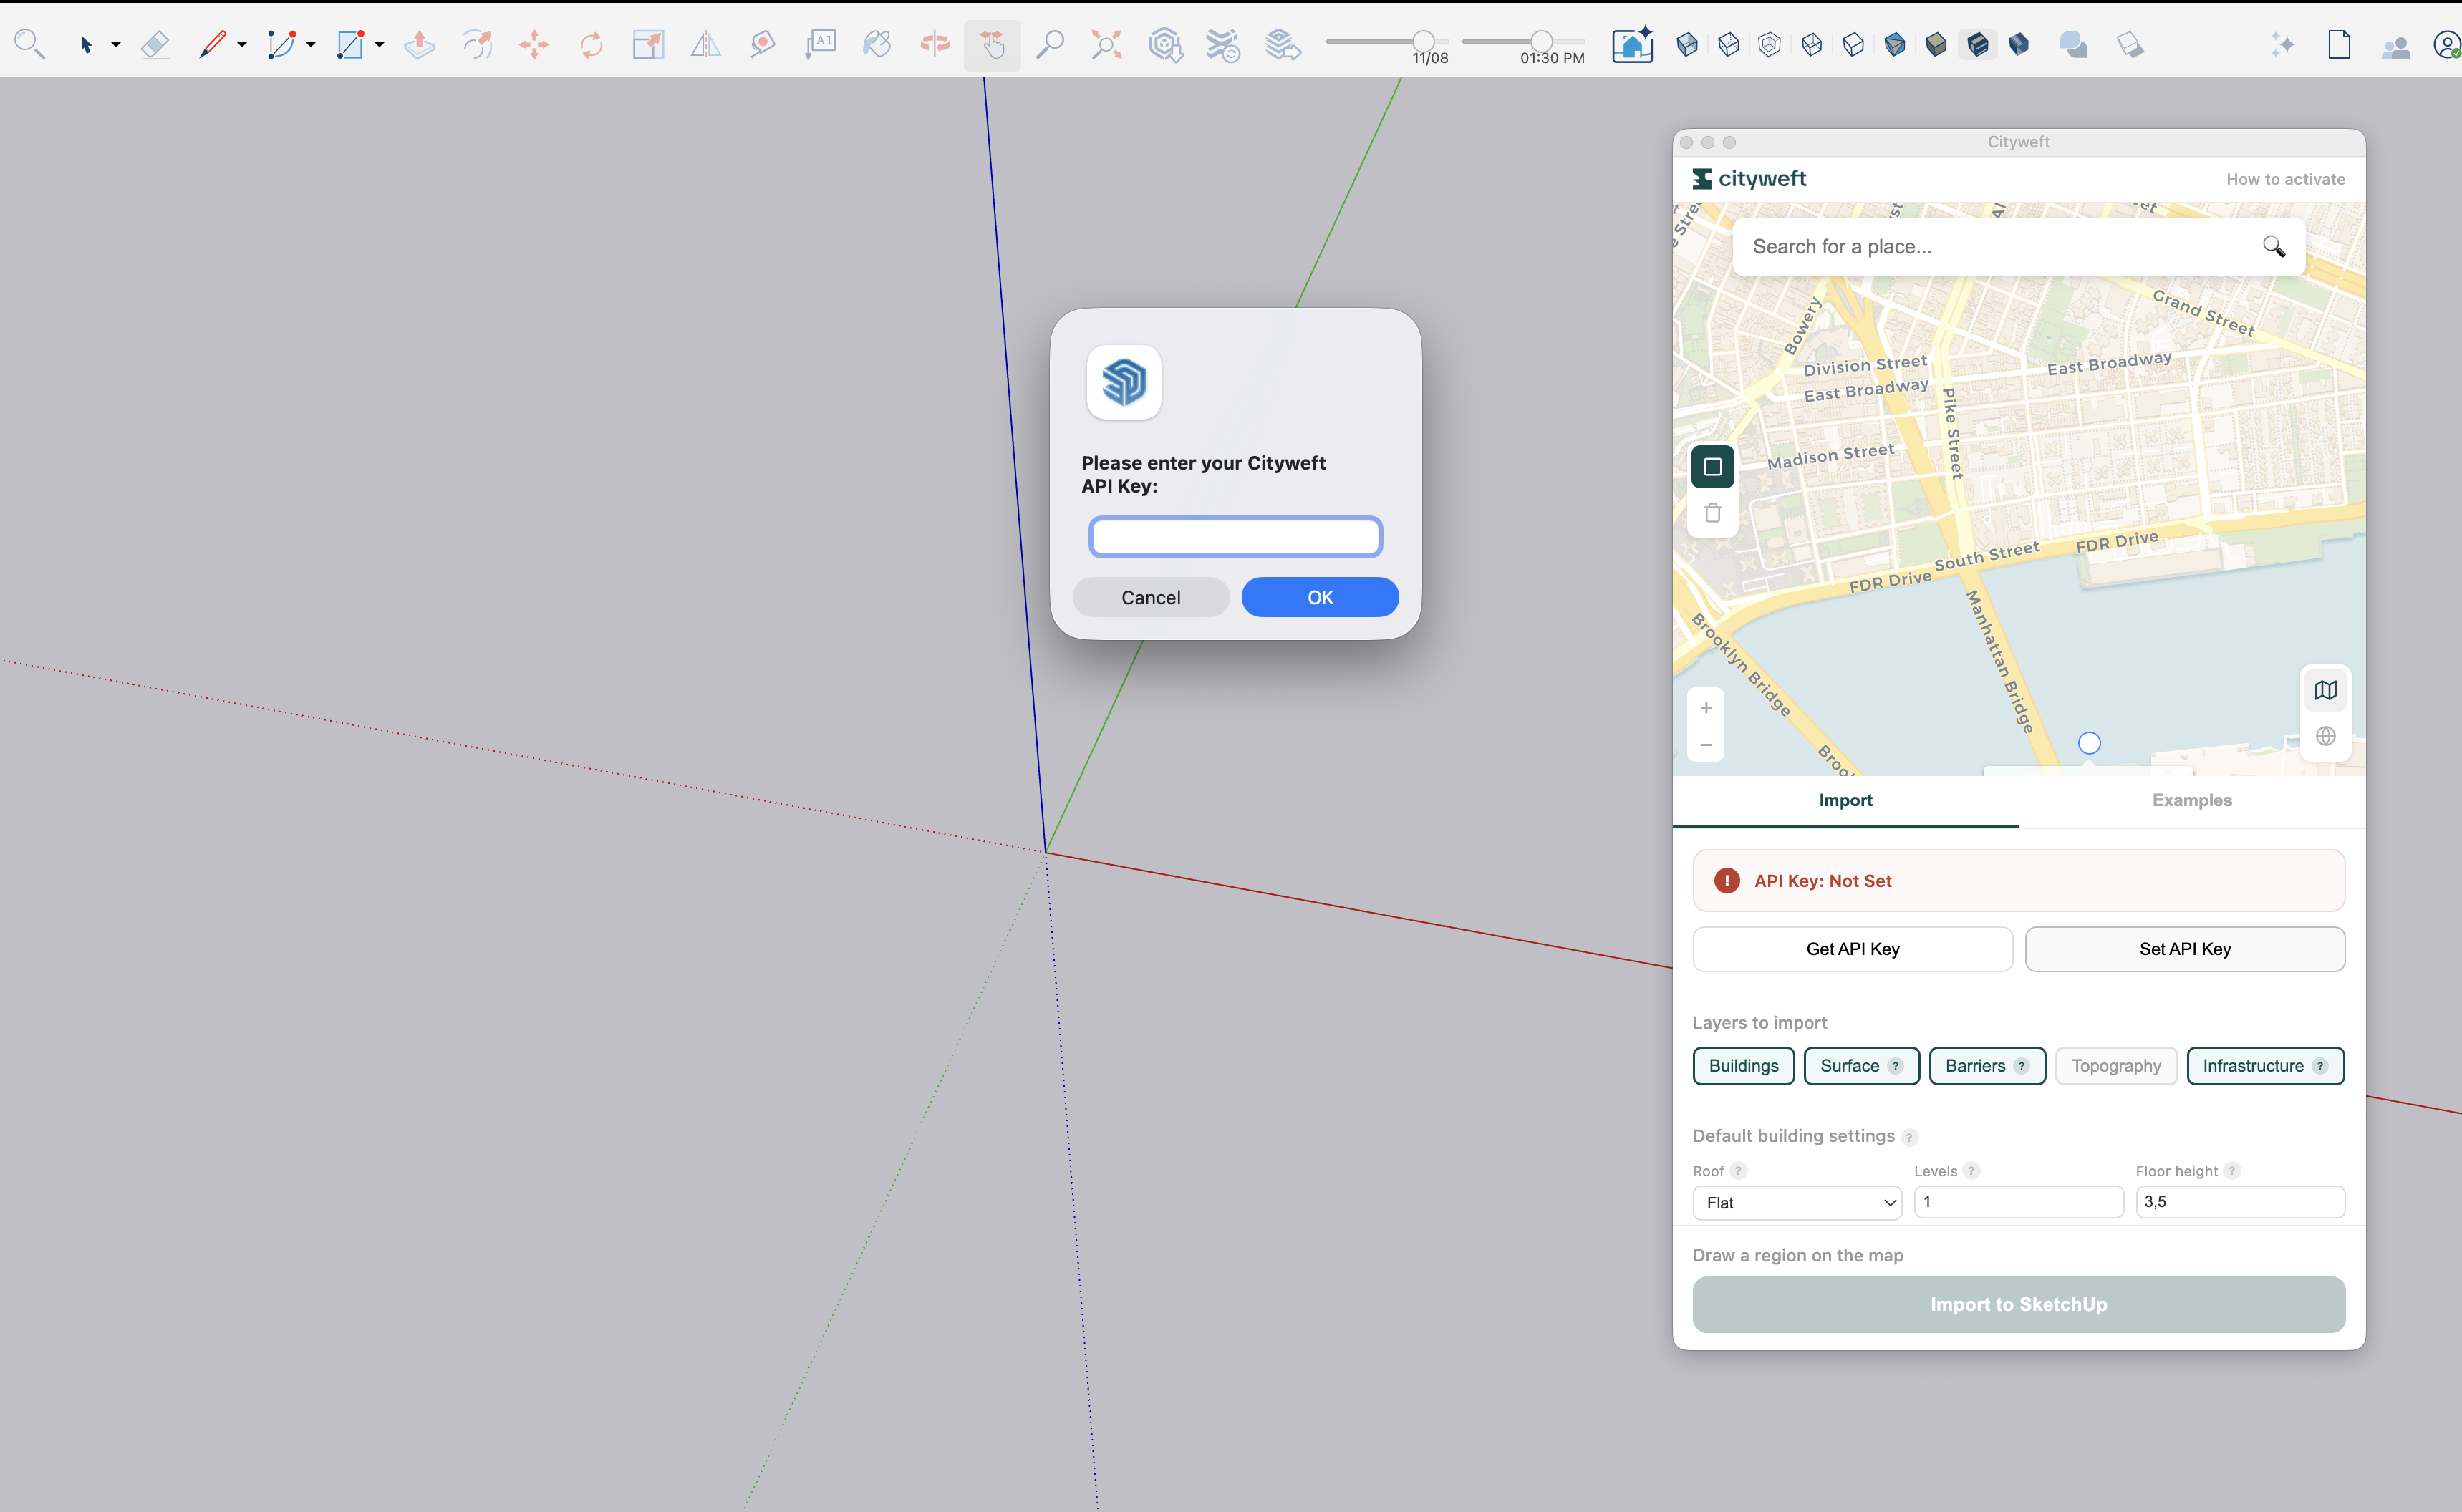
### 🔑 **Activating your API Key**
To activate the plugin the first time, you need to enter your API key. If you do not have this, please visit the **‘Getting your API Key’** page
1. Once you have retrieved your API key, simply go to the usage tab and find the ‘Set API Key’ button
Press "Set API Key"
2. Paste your API Key into the field and press ‘OK’
3. Once input correctly, you will see your account and subscription status, which means you are ready to go!
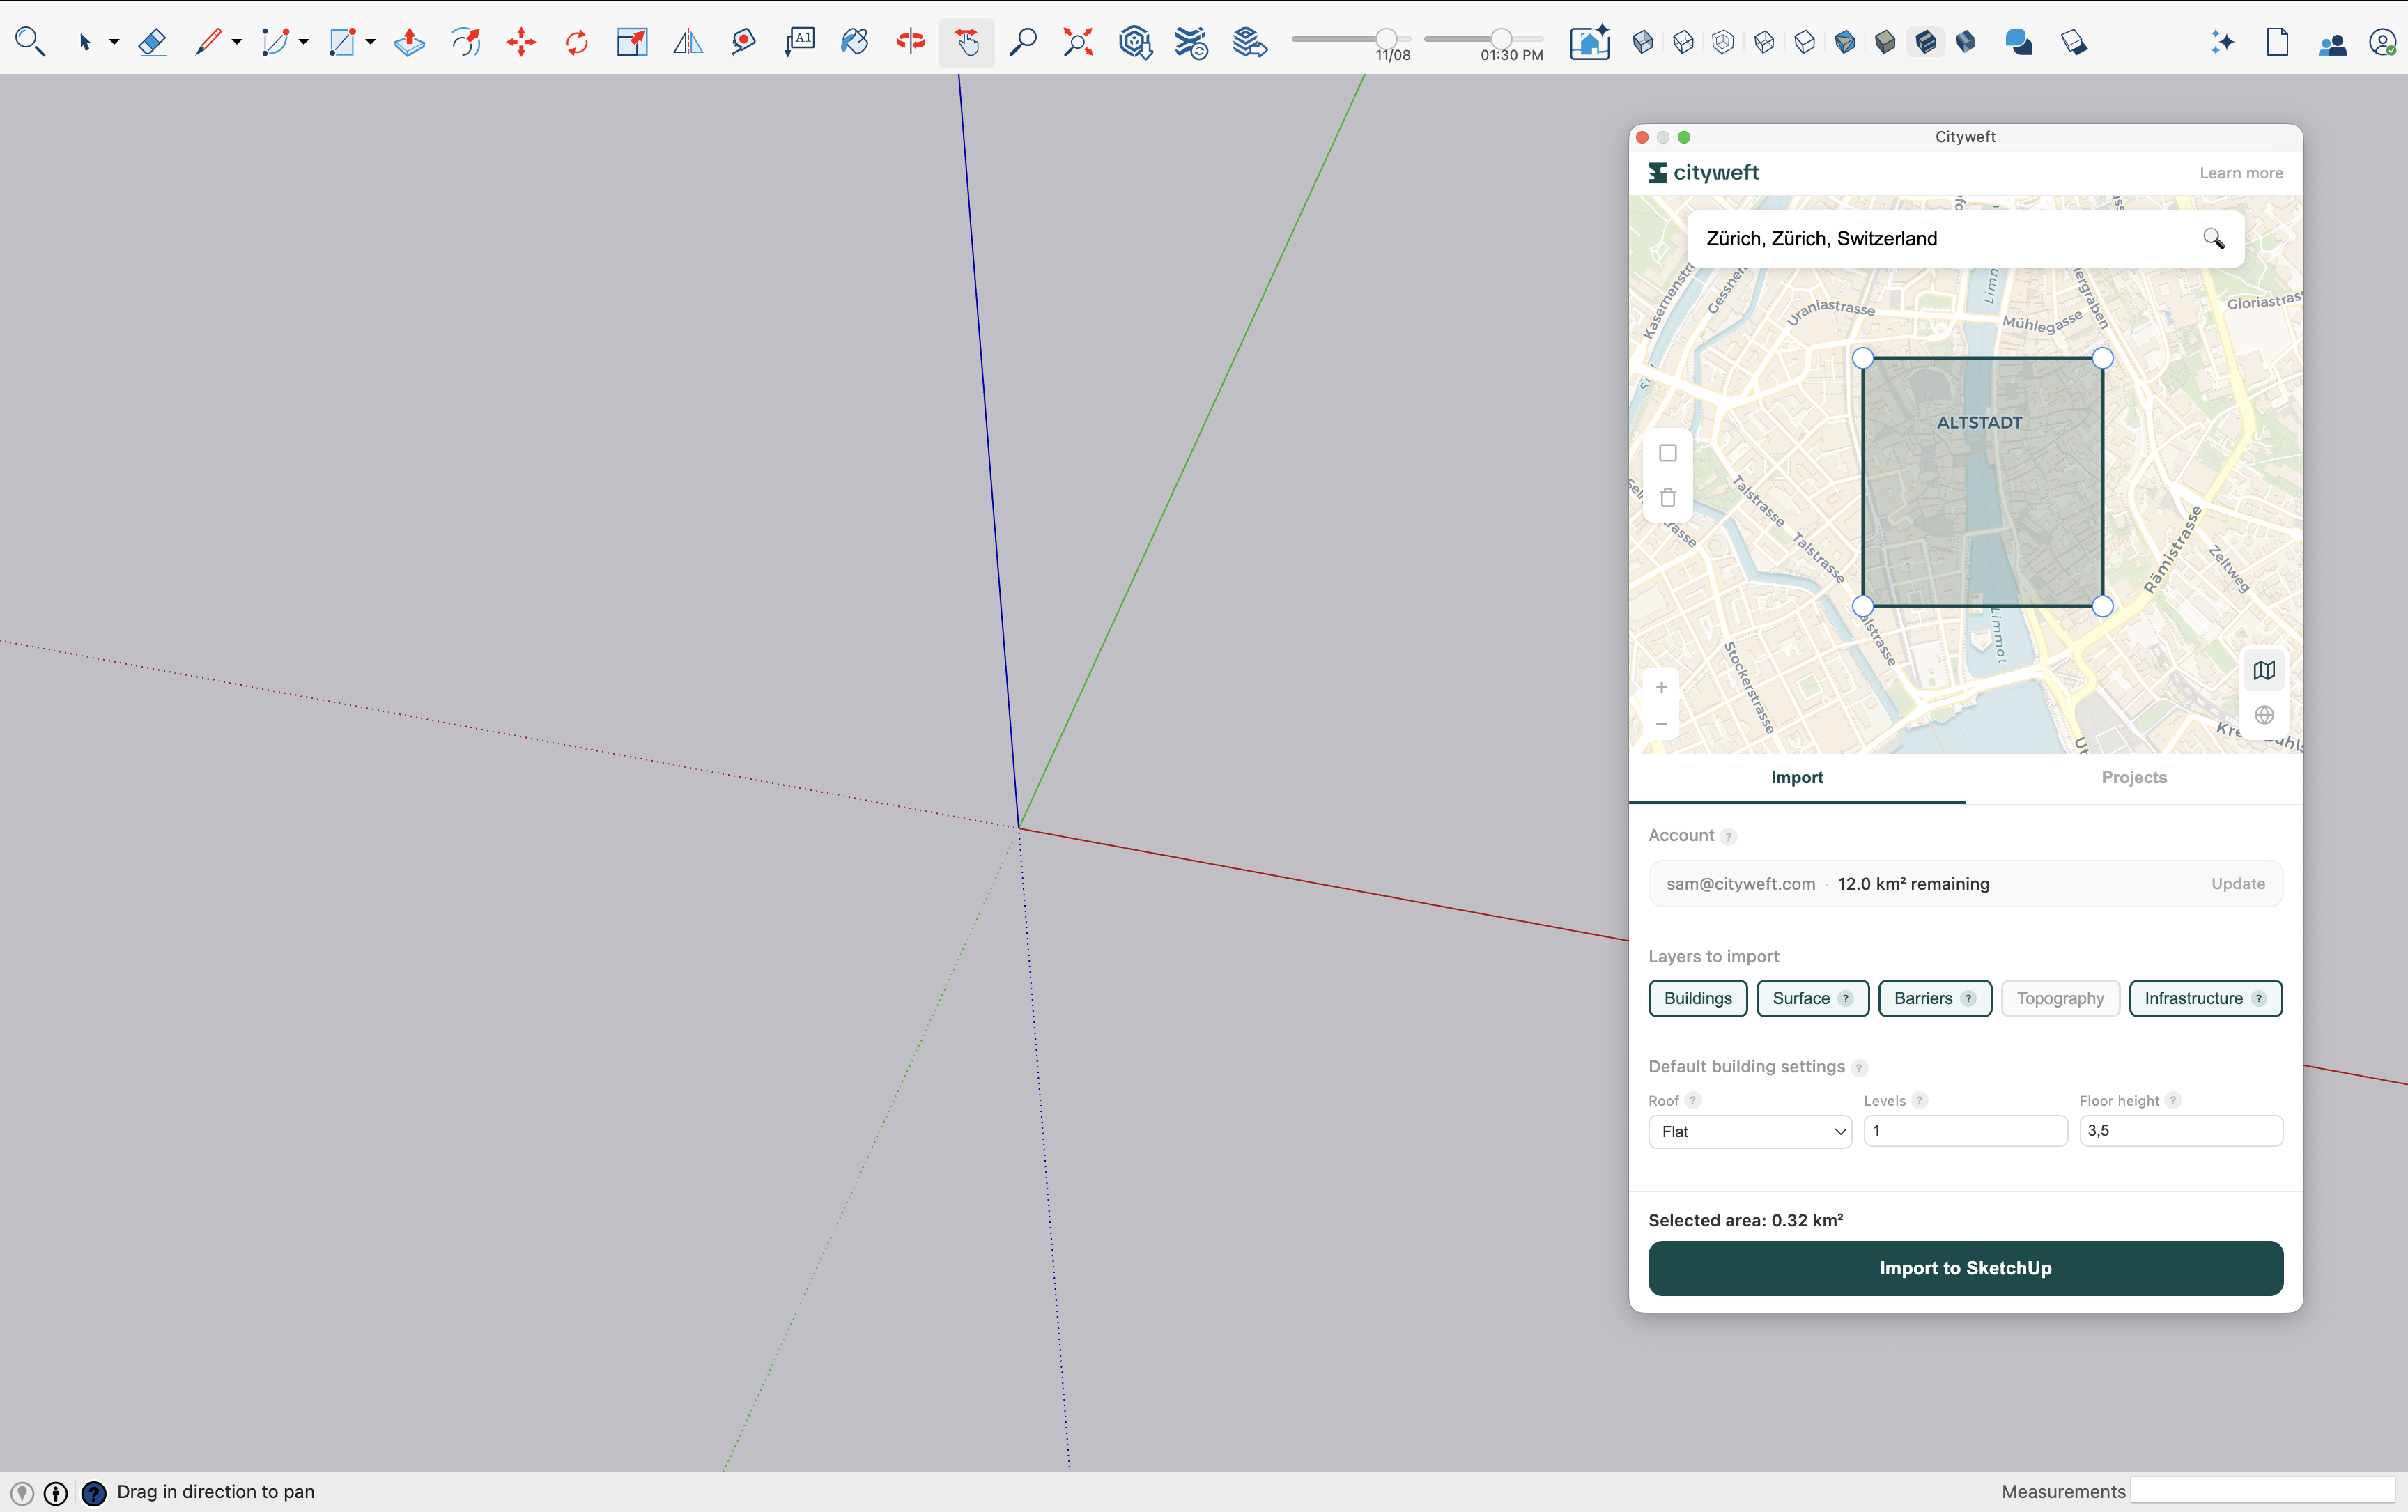
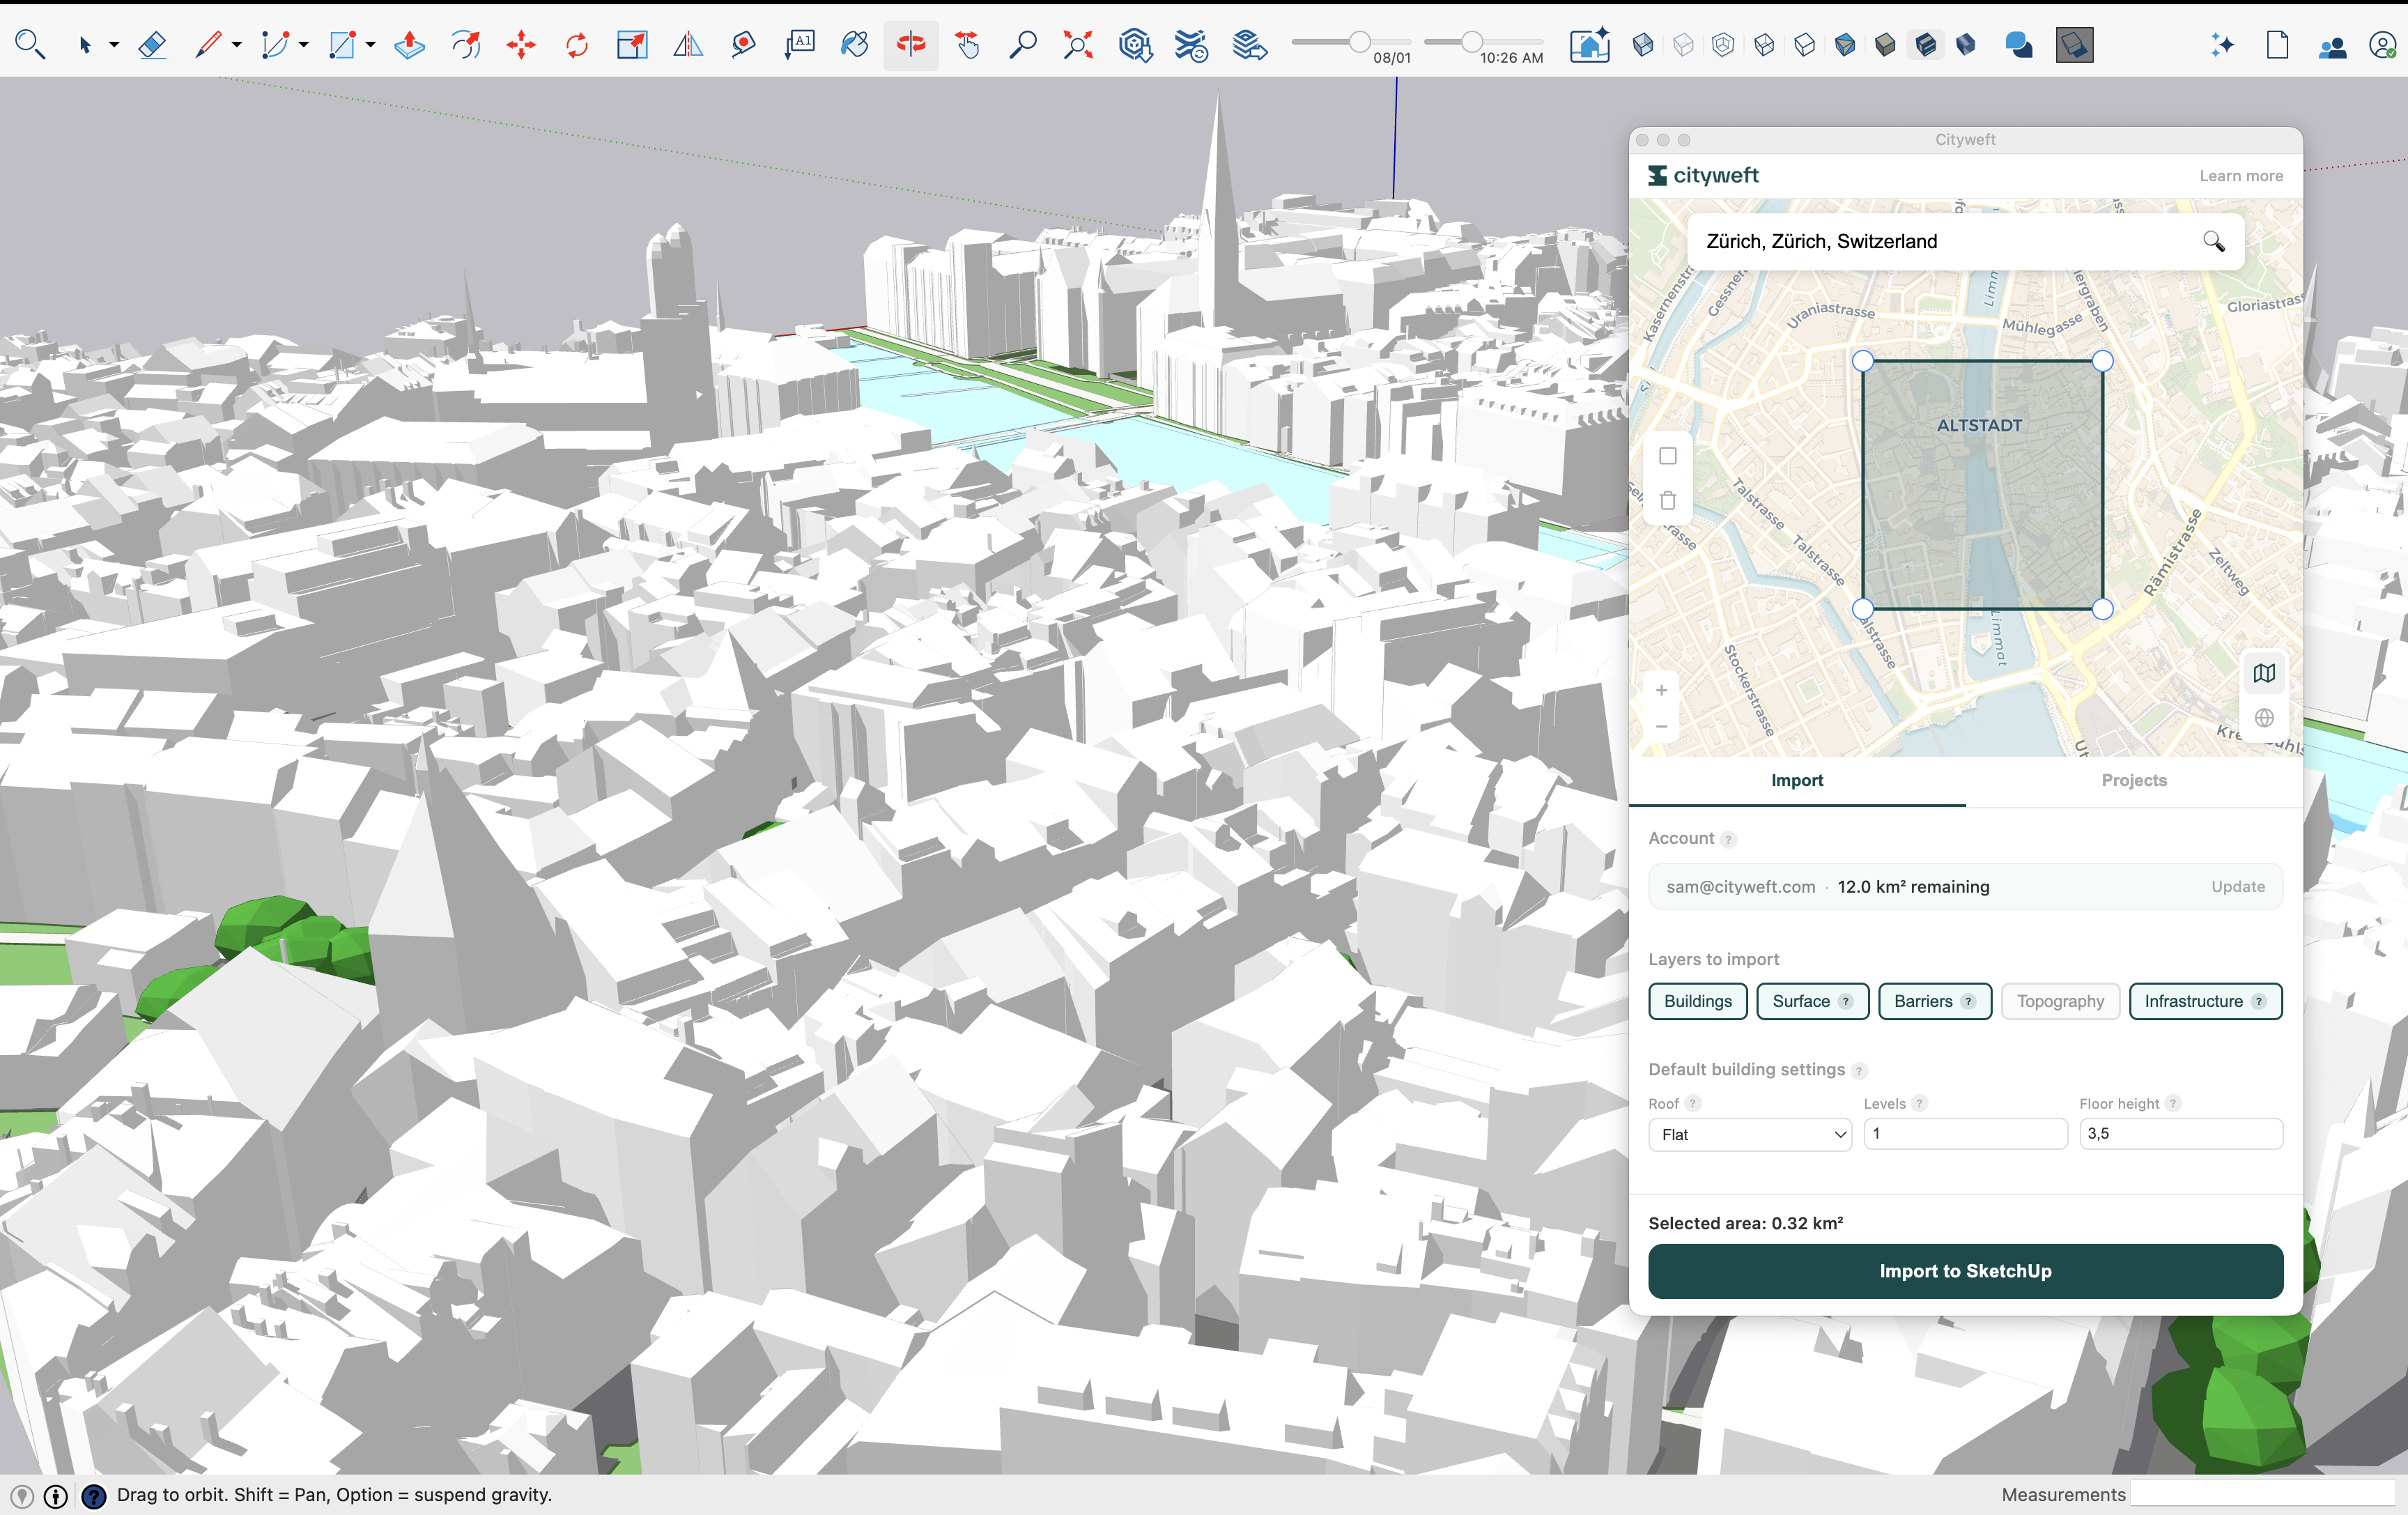
### 🏢 **Getting Your Model**
1. In the Cityweft window, **navigate or search** for your desired site location.
2. **Select an area** on the map using the polygon selection tool.
3. **Press the ‘Import to SketchUP’ button**\
\
The model will automatically appear in the viewport\
If you are selecting a large area with dense geometry, this process can take up to 1-2 minutes.
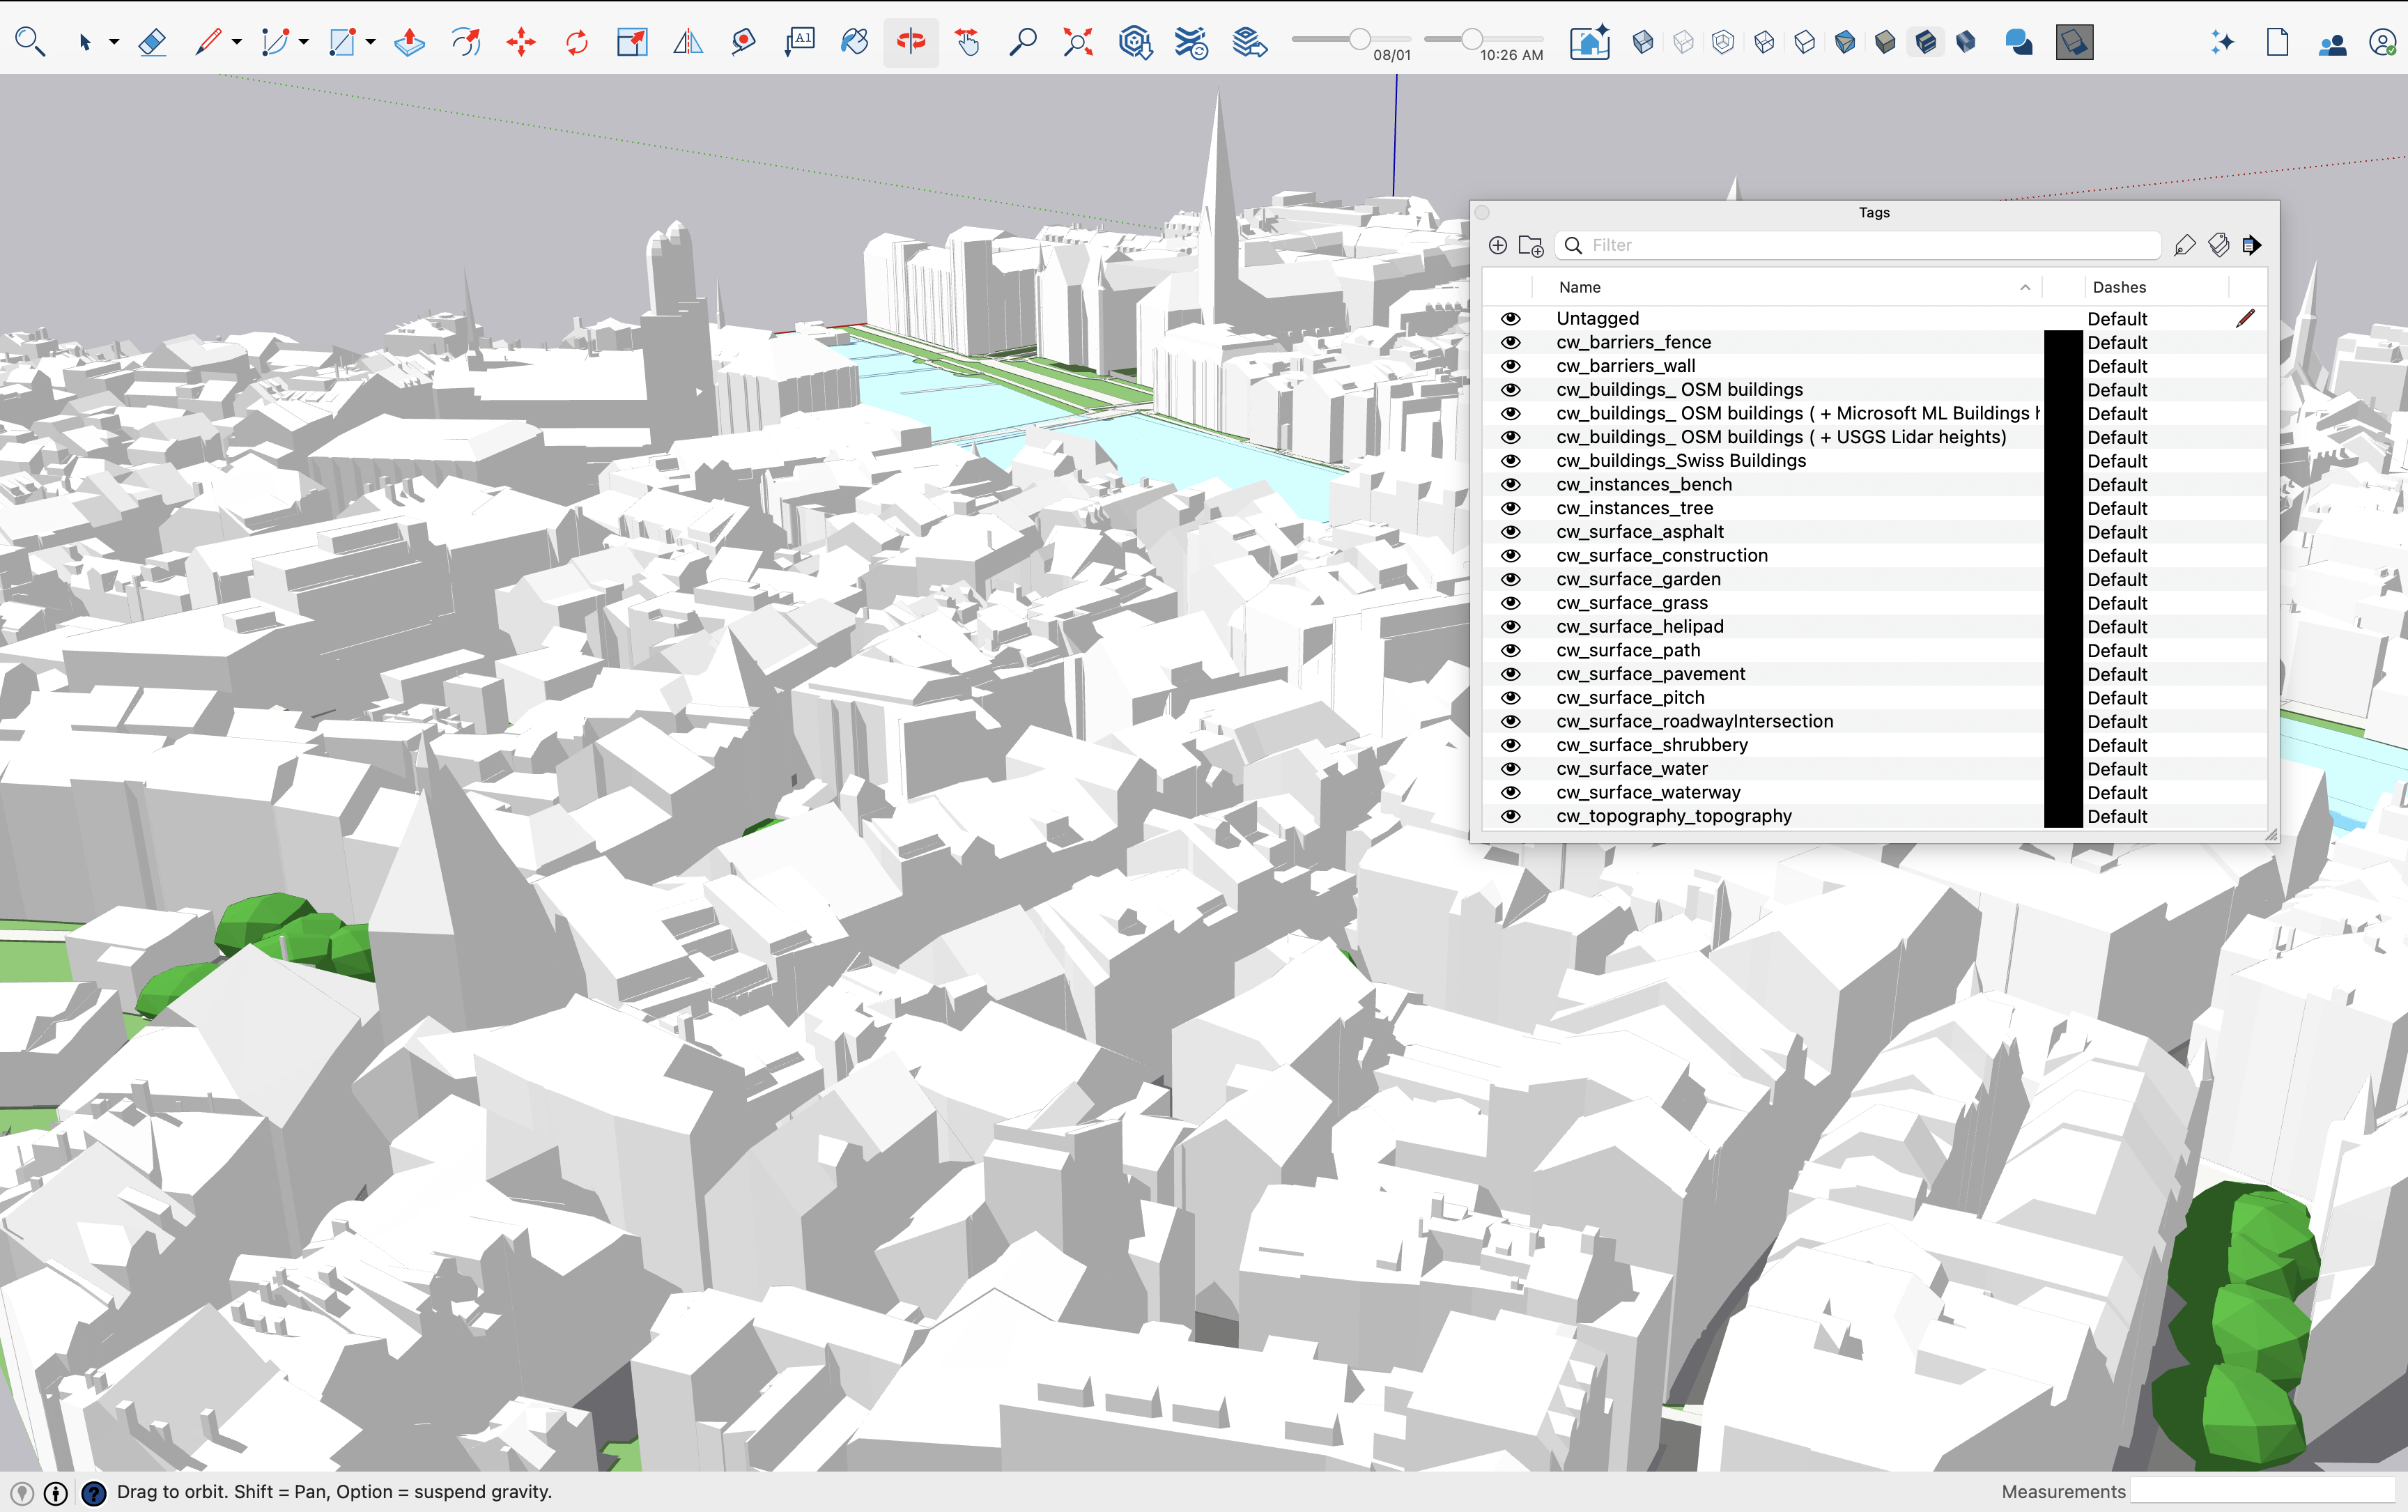
4. **View all the model layers in the tags window**
### ⚙️ Plugin **Settings Overview**
The Cityweft SketchUp plugin includes several settings that control what data is included and how it is processed when generating models.
These are grouped into two main categories:
***
#### **1. Layers to import**
*(Check boxes — choose which layers to include in your model)*
These options let you define which geometry types to include when downloading the model.
| **Option** | **Description** |
| ------------------ | ---------------------------------------------------------------------- |
| **Buildings** | Imports buildings and roof geometry. |
| **Surface** | Includes ground surfaces such roads, green space, or base mesh. |
| **Barriers** | Adds physical boundaries like fences, retaining walls, or embankments. |
| **Topography** | Imports detailed elevation data and terrain contours. |
| **Infrastructure** | Adds infrastructure layers such as trees, bus stops, or benches |
> 💡 Tip: If you only need building geometry, uncheck other layers to speed up processing.
***
#### **2. Default building settings**
*(Adjustable fields — define defaults for missing data)*
| **Setting** | **Description** |
| -------------------- | -------------------------------------------------------------------------------------------------------------------------------- |
| **Roof Types** | Sets a default roof geometry type for buildings that lack roof data. This does **not** override existing roof shape information. |
| **Levels** | Specifies how many building levels to assign when no height data is available. |
| **Level Height (m)** | Defines the assumed height of each building level in meters. Used to estimate total building height when no data exists. |
> 🏗️ These settings ensure that all buildings generate correctly, even when data is incomplete.